
Server Manager
The Server Manager is the primary gateway of functionality for auto-mcs. It consists of the main server selection menu, and the Launch screen. Both screens are used for different tasks, and this guide gives an overview of both.
Server Menu
Section titled “Server Menu”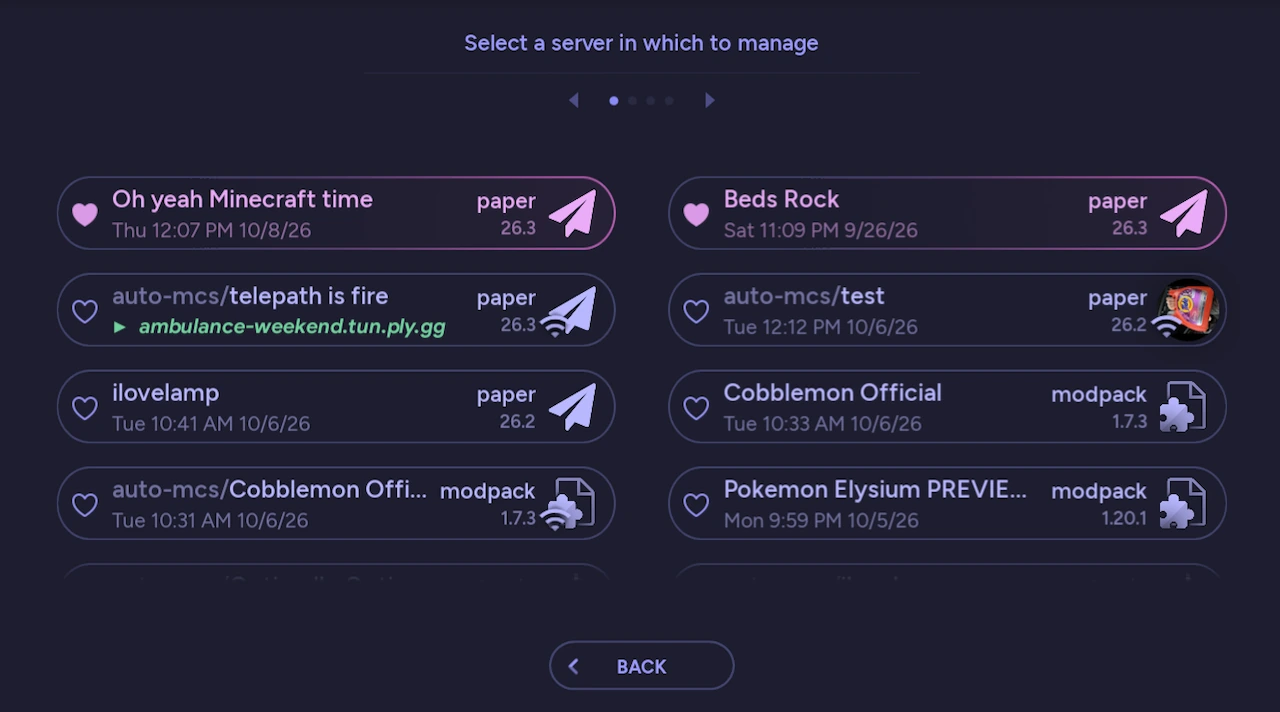
Open Server Manager from the home screen to see your servers in one place. Each button shows the server’s name, type, and version, along with its last activity or connection address if it’s running. This list includes local servers and connected Telepath servers.
| Left-click a server | Open its Launch screen |
| Click the heart / Middle-click a server | Add or remove the server from your favorites. Favorites stay at the top of the list |
| Right-click a server | Open the context menu for quick actions based on the server state |
Context menu
Section titled “Context menu”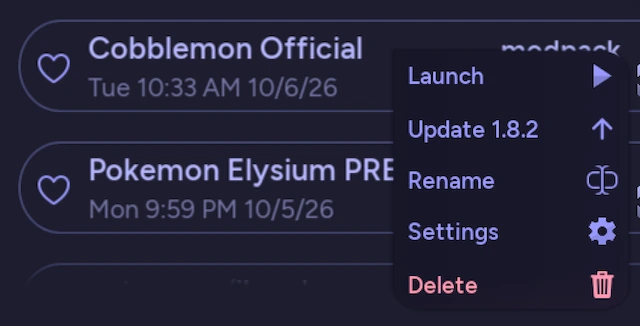
The available actions depend on whether the server is currently running.
| Server state | Available actions |
|---|---|
| Stopped | Launch, Update (when available), Rename, open Settings, or Delete |
| Running | Restart, Stop, Copy IP, or open Settings |
The actions in this menu operate on the server you clicked, including remote servers where the action is supported.
Global search
Section titled “Global search”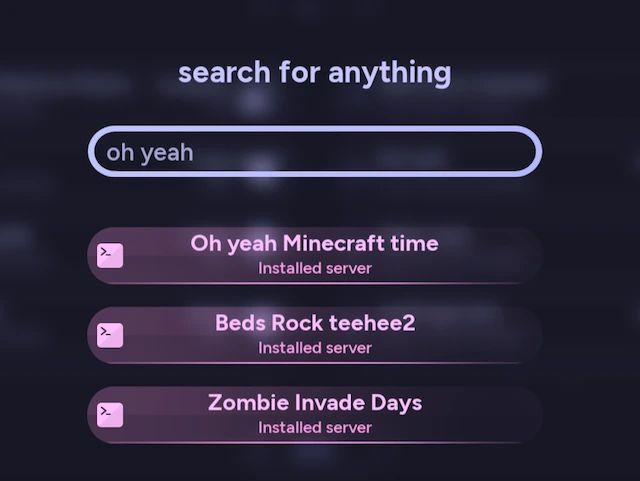
You don’t have to return to the Server Manager every time you want to open a different server. Global Search can find your servers from anywhere in the app, even when you’re in another menu.
Open global search by clicking the Search icon in the bottom right, or by quickly pressing Shift⇧Shift twice. You can then enter the server’s name and select the matching result. It can also find specific server actions, guides, and other app actions.
Launch
Section titled “Launch”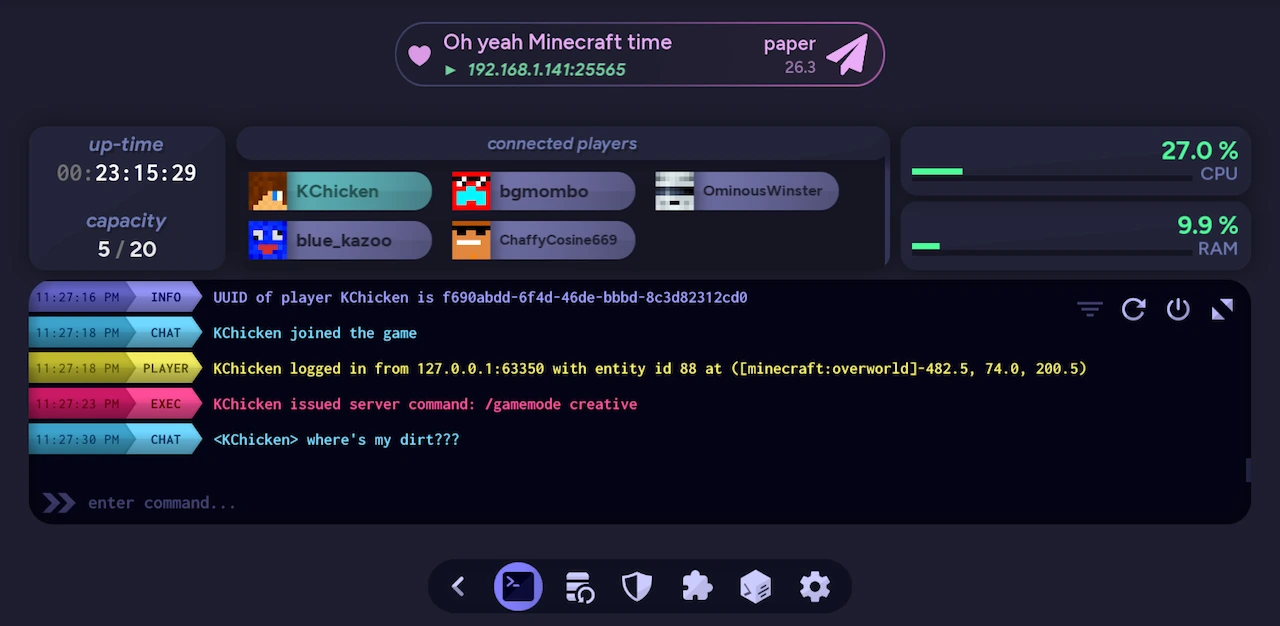
Selecting a server opens its Launch screen. This is where you start the server, check its status and performance, and navigate between management tools.
The server info at the top is similar to the button in the Server Menu, but has different controls. In particular, you can change a server’s icon by clicking on the icon itself. The icon can’t be changed from the Server Menu.
Server info
Section titled “Server info”
| Left-click the server icon | Choose a custom image to use as the server’s icon |
| Right-click the server icon | Remove a custom icon after confirming. The default server-type icon will be restored |
| Click the heart | Add or remove the server from your favorites |
| Left-click the server address | Copy the visible connection address to your clipboard |
| Right-click the server address | Copy the LAN address instead, for connections on your local network |
The copyable address appears beneath the server name while the server is running. On a stopped server, this area shows the last activity date instead.
Console
Section titled “Console”The Console panel starts the server and shows log messages, CPU, RAM, uptime, and player information once the server is running. These controls, along with the player list, keyboard shortcuts, and a command reference, are documented in the Console guide. For diagnosing startup failures and crash reports, see Server Troubleshooting for more details.
Taskbar
Section titled “Taskbar”The taskbar provides the main navigation inside the Server Manager. Each button opens a different part of your server’s configuration.
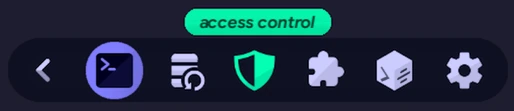
| Back | Return to the Server Menu |
| Launch | Start or stop the server, enter console commands, monitor performance, and manage connected players |
| Back-ups | Create and restore server snapshots, or configure automatic back-ups |
| Access Control | Manage operators, bans, and the whitelist |
| Add-ons | Download, import, and enable or disable plugins and mods on supported distributions |
| amscript | Download, import, and create scripts with the built-in IDE and API |
| Settings | Change the world, edit server.properties, configure updates, and modify other server settings |