
Deployment
auto-mcs is built primarily as a native desktop app for Windows, macOS, and Linux. It provides a graphical interface for creating, configuring, and managing Minecraft servers without needing to manually install Java, server files, or even use a terminal.
The app is portable and doesn’t require a traditional installer. For most cases, simply download the release for your operating system, extract it, and launch auto-mcs.
Installation
Section titled “Installation”First, download the latest release if needed.
Windows
Section titled “Windows”Download the Windows release and extract the contents of the .zip archive to a directory of your choice.
Launch auto-mcs.exe to open the app. You can create a shortcut to the executable or move the extracted folder without affecting your installed servers.
Download the macOS release and open the .dmg file. Copy auto-mcs.app into your /Applications folder, or another location of your choice.
If you’d like to launch auto-mcs from Terminal or specify additional launch options, target the executable located inside the app bundle:
/Applications/auto-mcs.app/Contents/MacOS/auto-mcsDownload the appropriate release for your system’s architecture and extract the .zip archive. Some desktop environments support double click to run, such as KDE Plasma, or GNOME.
In other cases, you may need to grant executable permissions to the binary:
chmod +x auto-mcsThen launch it through a terminal:
./auto-mcsThe graphical interface requires a compatible desktop environment and display. Linux builds support graphical desktop sessions, including X11 and Wayland environments.
First launch
Section titled “First launch”When opened, auto-mcs initializes its app data, generates a configuration, and prepares a cache and components required for its server management.
You don’t need to install Java separately. auto-mcs includes internal Java management features which can obtain and configure the appropriate runtime for your servers.
For the initial setup, you can either create a new server using the built-in templates or import an existing installation.
| Getting Started | Overview of creating and managing your first server |
| Create a Server | Choose a Minecraft version, distribution, and configuration |
| Import a Server | Bring an existing server or back-up into auto-mcs |
| Modpacks | Install a modpack from Modrinth or an external server pack |
Once installed, servers are managed through the Server Manager. You can create multiple servers, change their settings independently, and launch or stop them whenever needed.
Updating
Section titled “Updating”Official releases support automatic update checking, which is enabled by default in the global app configuration.
When a newer version is available, auto-mcs can prompt you to update. Clicking Install will automatically download and update the existing binary in-place, and restart.
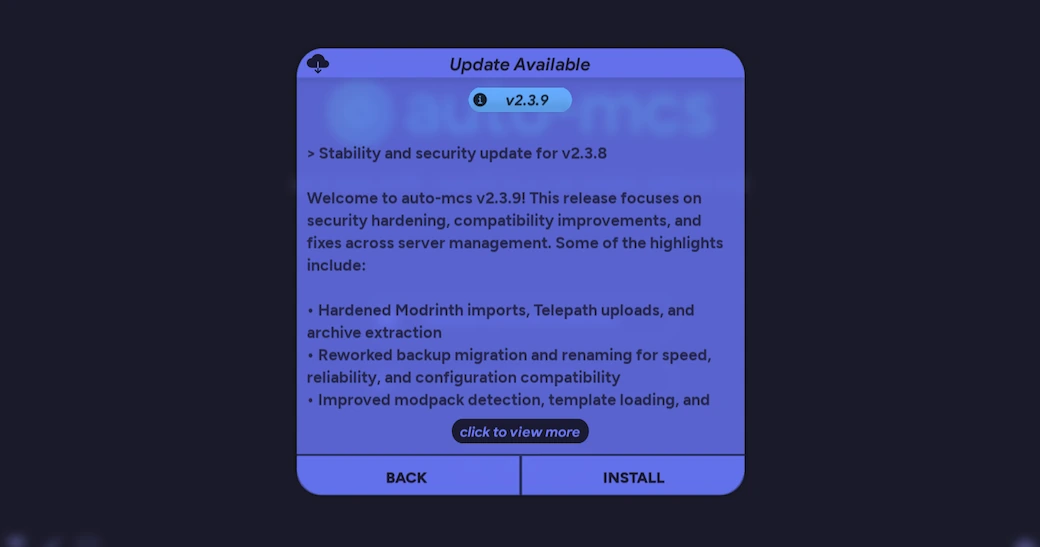
Update checking can be disabled through the app’s configuration if you’d prefer to manage releases manually. You can download the latest release and replace the existing executable or app bundle
Since the app data is stored separately from the binary, your installed servers, configuration, and back-ups are retained when replacing the binary itself.
App data
Section titled “App data”By default, auto-mcs stores its configuration, servers, back-ups, downloads, and internal tools in a dedicated directory in your user profile.
This directory is separate from the app executable.
| Platform | Default data directory |
|---|---|
| Windows | %appdata%\.auto-mcs |
| macOS | ~/Library/Application Support/auto-mcs |
| Linux | ~/.auto-mcs |
The following subdirectories contain the primary app data:
Servers | Installed servers and their configuration |
Backups | Server back-ups created by auto-mcs |
Config | Global app configuration |
Tools | Managed Java installs, playit.gg, amscript data, Telepath data, and templates |
Logs | Application, crash, and session logs |
Cache | Cached metadata and other temporary resources |
Downloads | Downloaded files used by auto-mcs |
Uploads | Files staged for import or transfer over Telepath |
Launch options
Section titled “Launch options”You can launch auto-mcs with optional command-line flags to alter the startup behavior. These are separate from JVM flags, or the headless CLI.
Flag reference
Section titled “Flag reference”-h, --help | Display the available launch arguments |
-d, --debug | Enable verbose logging and console output; see Troubleshooting |
-l, --launch | Automatically launch one or more existing servers |
-s, --headless | Launch the terminal interface instead of the graphical interface |
--reset | Reset the global app configuration and clear the cache |
--bypass-admin-warning | Bypass the elevated permissions warning on startup (not recommended) |
--bypass-disk-warning | Bypass low disk space restrictions (not recommended) |
Launch with flags
Section titled “Launch with flags”To pass flags to auto-mcs, open a terminal and run the appropriate executable for your operating system. In these examples, --flag1 and/or --flag2 should be replaced with the flags you want to use.
Windows (PowerShell):
.\auto-mcs.exe --flag1 --flag2macOS:
# Open the GUI window with flagsopen -a "auto-mcs" --args --flag1 --flag2
# Or if you're feelin' sassy# This waits and shows terminal output instead of just opening a windowopen -W --stdout $(tty) --stderr $(tty) -a "auto-mcs" --args --flag1 --flag2
# Otherwise, you can run the binary directly for STDIN, like with headless/Applications/auto-mcs.app/Contents/MacOS/auto-mcs --flag1 --flag2
Linux:
./auto-mcs --flag1 --flag2Debugging
Section titled “Debugging”Use --debug to enable verbose logging:
./auto-mcs --debugAutomatic launches
Section titled “Automatic launches”Use --launch or -l to automatically start one or more existing servers when auto-mcs opens.
# For a single server:./auto-mcs --launch "My Server"
# Or multiple servers:./auto-mcs --launch "My Server, Server 2"
Server names must be separated by commas, and already exist in auto-mcs. If a specified server doesn’t exist, the app will exit with code -1.
This can also be combined with other flags:
./auto-mcs --debug --launch "My Server"Reset configuration
Section titled “Reset configuration”If the global app configuration becomes invalid or you want to restore the default settings, use:
./auto-mcs --resetThis resets the global app configuration and cache during startup.
It does not intentionally delete the installed servers or back-ups, which are stored separately. However, preferences stored in app-config.json will return to their defaults.
Bypassing warnings
Section titled “Bypassing warnings”Two additional flags are available for exceptional situations:
| Flag | Behavior |
|---|---|
--bypass-admin-warning | Bypass the warning associated with launching auto-mcs using elevated permissions |
--bypass-disk-warning | Disable the normal free-space checks used to protect server operations |