
playit.gg
If you’re unable to configure your router or your ISP has a strict NAT/CGNAT policy, auto-mcs integrates playit.gg to allow connections through tunneling without conventional port forwarding.
A playit tunnel forwards traffic between your local server’s port and a public playit.gg address (like example.tun.ply.gg) which allows people across the internet to join.
How it works
Section titled “How it works”When enabling playit.gg integration for a server, auto-mcs installs and starts the playit agent using your linked account. It creates or reuses a tunnel for the server’s active port, and displays the public tunnel address in the Server Manager after launch. For instance, if you change the server’s port, auto-mcs will create and use a new tunnel for that port automatically.
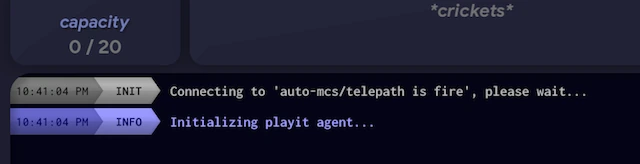
The agent and its configuration are stored in the app data directory, separately from your server files. The same agent can manage tunnels for multiple servers, and stops after the last server using it shuts down. Each server gets its own connection address; see Running multiple servers for how auto-mcs handles port conflicts.
Agent setup
Section titled “Agent setup”You can enable the proxy while creating a server, or later in the server’s Network Settings. For convenience, instant templates enable playit tunneling by default. You can turn it off if you don’t need it.
Link account
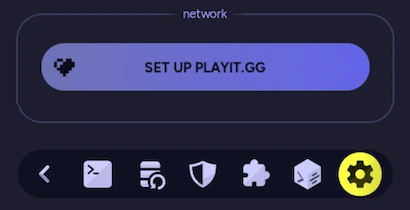
Section titled “Link account”Linking your playit.gg account allows auto-mcs to download the playit agent and tunnels automatically on your behalf. If your account isn’t linked yet, click Set up playit.gg and follow the wizard to set it up:
-
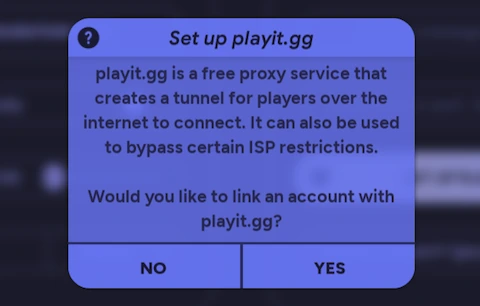
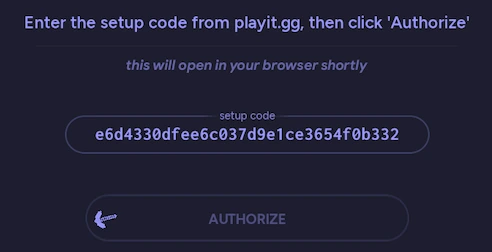
Select Yes to the Set up playit.gg pop-up. The setup page will open in your browser
-
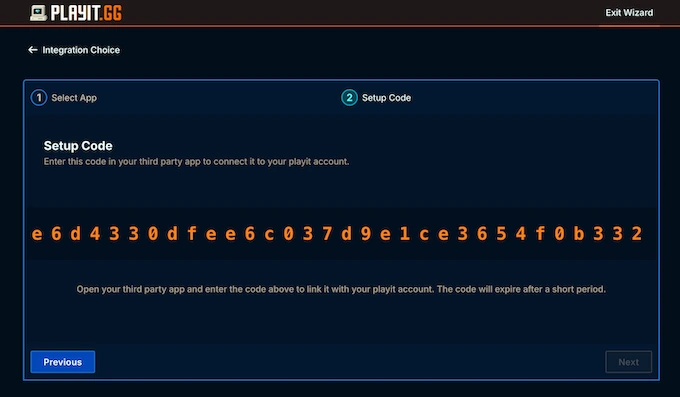
Sign in to playit.gg if prompted, and copy the Setup Code
-
Paste the code into auto-mcs and it will automatically authorize your account
-
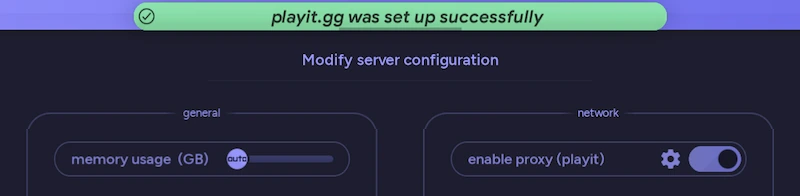
Once authorized, the proxy is enabled for this server. Future launches will use this linked account
Management
Section titled “Management”Use enable proxy (playit) to enable or disable playit tunneling. This setting is saved per server independently, and auto-mcs will automatically create and manage tunnels for all servers with this setting enabled.
When enabled, auto-mcs clears the server’s bound IP address in server.properties. You can still change its port, but manual IP binding is unavailable while using this setting.
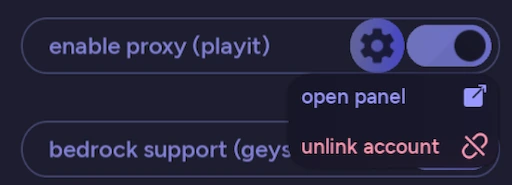
To manage the local agent, click the settings button beside the proxy switch to open its drop-down menu:
| Open panel | Open the linked agent’s page on playit.gg in your browser; you may need to sign in again |
| Unlink account | Remove the local account link from auto-mcs; this requires confirmation |
Proxy protocol
Section titled “Proxy protocol”When using playit, Minecraft may see the tunnel’s local/proxy IP instead of a player’s real address. This can affect IP bans, geolocation, and the details shown in Access Control.
Proxy Protocol forwards the original client’s IP address to a server that supports it. It isn’t required just to let players connect; it must be configured on both the playit tunnel and the receiving server.
On Paper, for example, the setting is proxies.proxy-protocol in config/paper-global.yml. Enable the matching setting on your playit tunnel and select a compatible Proxy Protocol version (playit recommends v2). The Paper guide covers this process.
For Bedrock connections, Geyser has separate bedrock.enable-proxy-protocol and remote.use-proxy-protocol settings. Follow playit’s Geyser instructions so Geyser, Paper, and the tunnel agree on the protocol.
Troubleshooting playit.gg
Section titled “Troubleshooting playit.gg”When having connectivity issues, always start with verifying local connectivity before changing anything with playit. If playit is the culprit, the server will work over LAN, but not over the internet. Below are some common issues and methodologies for working through this process. Keep in mind that for most of these tests, the server you are testing needs to be running.
Nobody can join
Section titled “Nobody can join”- Verify the local connection. First, test the server itself, and then test your local network. If the LAN connection doesn’t work, playit won’t either
- Check the address you shared. On the Launch screen, click to copy the
example.tun.ply.ggpublic address displayed at the top to give to people who are connecting; this address needs to be entered into their Minecraft client. If you only see a private LAN address at the top (such as192.168.x.x), the tunnel is not starting - Check your agent and tunnel. In the server’s Network Settings, click the settings button beside enable proxy (playit), and select Open panel. On playit.gg’s website under Agents, check that the auto-mcs agent is online & connected, and that the tunnel is enabled and points to the correct local port. Compare it with the one used by the server. If the agent is offline, the tunnel is not starting
- Test from outside your network. Test the public connection with the playit address
If the public test fails for everyone while LAN works: check the tunnel’s local destination and the Console for Initialized playit connection 'example.tun.ply.gg'. If the agent is offline or the initialization failed, the tunnel did not start.
Some people can’t join
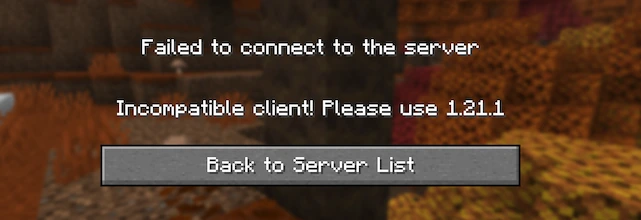
Section titled “Some people can’t join”First, ensure everyone’s Minecraft client is compatible with the server; confirm that a compatible game version is used, and that any required client-side mods are installed. Additionally, a Java tunnel doesn’t convert a Java server into Bedrock; Bedrock connections require Geyser and its UDP setup.
If someone sees Unknown host or can’t resolve the example.tun.ply.gg hostname while other people can connect, their DNS resolver may be the problem. A DNS server translates the server name into an IP address, and the playit hostname may not be resolving an IP address for them at all.
You can use a terminal to compare the normal DNS lookup with Cloudflare’s:
nslookup example.tun.ply.ggnslookup example.tun.ply.gg 1.1.1.1Have them replace example.tun.ply.gg with your server’s hostname without its :port. If the usual lookup fails but Cloudflare returns an address, have them change their DNS settings. Visit 1.1.1.1/help, scroll down to the Setup guides, and select their operating system. The page provides step-by-step instructions and videos for changing DNS settings, and can also help verify that they’re using Cloudflare. After setting this up, have them try connecting again.
If DNS starts resolving but Minecraft still times out, return to the public connection test. If this change doesn’t help, restore your previous DNS settings or use the Automatic configuration.
The tunnel doesn’t start
Section titled “The tunnel doesn’t start”If the example.tun.ply.gg address doesn’t appear after launch, start small and you can usually find out why:
- Check that the playit integration is enabled. Open the server’s Network Settings and confirm enable proxy (playit) is enabled
- Check the Console for startup warnings. A successful tunnel initialization will display:
Initialized playit connection 'example.tun.ply.gg'. If the integration is enabled and initialization fails, auto-mcs will display a warning:The internal playit service is currently unavailable. This means the tunnel did not start. To find out why, open the application log and search for “error starting playit service” or “PlayitManager” to see the underlying error. - Check playit’s network itself. Open the playit.gg status page. If its network or your region is experiencing an outage, leave the local agent alone and check again after service is restored.
You can also run !info network after launch to confirm which address auto-mcs is currently using. A successfully initialized playit tunnel will use its tunnel hostname as the active address
Still not working? Try relinking the account:
- First, stop the server. In the playit settings drop-down, choose Unlink account and confirm. Then, repeat the steps to link your account. After this, launch the server again and check whether the tunnel starts successfully
As a last resort, you can reset the local agent files:
- Completely exit auto-mcs, and stop any running servers
- Open the app data directory and find
Tools/playit. Only delete this folder. This removes the local agent, account configuration, and tunnel cache - Restart auto-mcs, go to your server’s Network Settings, and repeat the steps to link your account. After this, launch the server again and check whether the tunnel starts successfully
The address keeps changing
Section titled “The address keeps changing”If you have several tunnels on your account for the same port, auto-mcs may pick one that you don’t wish to use. From Open panel, navigate to the Tunnels tab on playit.gg’s website to view the configured tunnels, or remove any of the ones you don’t wish to use.
Otherwise, check the Console for Networking conflict detected. When another process occupies its configured port, auto-mcs temporarily assigns a free port, then creates or reuses a playit tunnel for that active port. The public address can change as a result. See Running multiple servers for more information.
If you’ve deleted or modified a tunnel in the playit web panel, it may also be recreated with another public address. Always copy the current address from the Server Manager before sharing it as this can change.